-
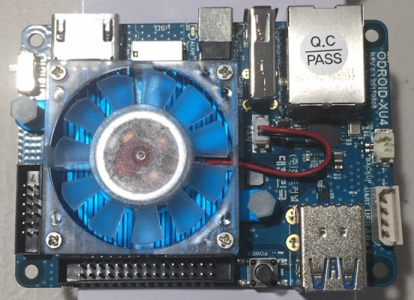
Attach the barrel end of the power adapter to the power slot on ODroid XU4 and
plug the other end to the power strip. Similarly, attached one of the Ethernet cable to the RJ45 slot on
ODroid XU4 and the other end to the Ethernet Switch as shown in the
illustration below:
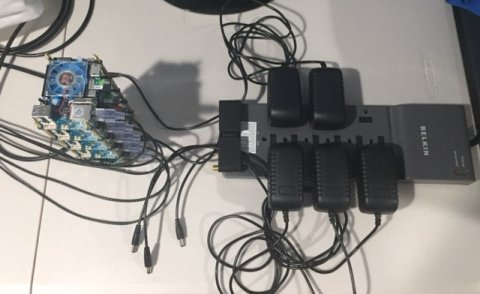
ODroid XU4 Connected
-
Connect a HDMI monitor to the ODroid XU4 using HDMI and power up the power
strip. The ODroid XU4 should take few seconds to boot up and if all goes well,
will present a login prompt. The default user-id is root and the default
password is 1234. Enter the default user-id and the default password to
login. We will be prompted to change the default password. Enter the default current password, followed
by the new stronger password and then re-confirm the newer (stronger) password.
Next, we will be prompted to create a new user-id followed by a prompt to assign a password. We will
create the user-id xu4 and assign a password.
After the new user-id is created, it will launch the Armbian desktop as shown
in the illustration below:

Armbian Desktop
-
Open a terminal window by clicking on the Applications icon on the top
left corner and then choosing the Terminal option from the drop-down. In
the terminal window, execute the following command:
This will open a screen as shown below:
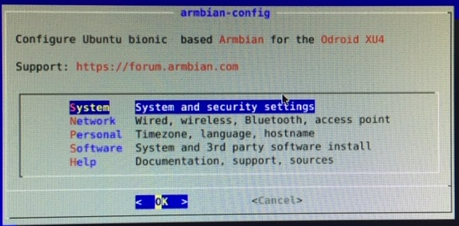
Armbian Config
We will refer to this screen as the MAIN screen
-
Choose the first option System from the MAIN main
screen. Press the tab key to navigate to the <OK> button and press enter.
This will open a screen as shown below:
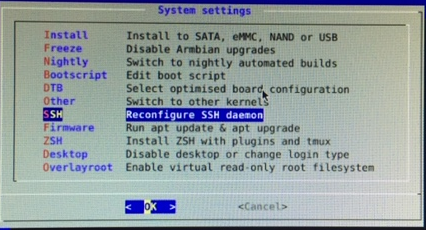
System Settings
We will refer to this screen as the System Setting screen.
Choose the option SSH to install and enable the SSH server. Press the tab key
to navigate to the <OK> button and press enter. This will display the SSHD
options screen as shown below:
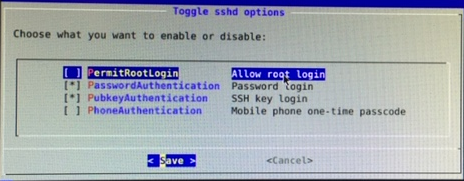
SSHD Options
Uncheck the first option PermitRootLogin and press the tab key to navigate to
the <Save> button and press enter. This will save the configuration. Next,
press the tab key to navigate to the <Cancel> button to exit this screen.
This will take us back to the System Setting screen
-
Choose the option DTB to optimize the board configuration as shown below:
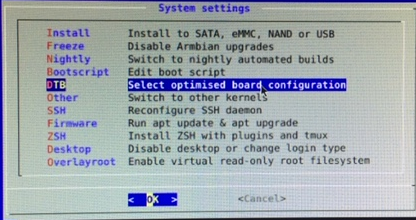
DTP Option
Press the tab key to navigate to the <OK> button and press enter. This will
display a screen with a list of board(s) to choose from as shown below:
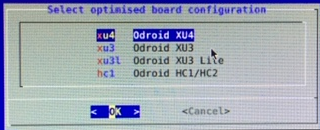
Board Configuration
Select the first option Odroid XU4 and press the tab key to navigate to
the <OK> button and press enter. This will display a screen prompting if we
want to reboot the device as shown below:
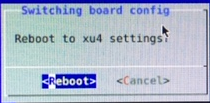
Reboot Board
Press the tab key to navigate to the <OK> button and press enter. This will
reboot the board and take us back to the Armbian desktop.
Once again open a terminal window and execute the following command:
Choose the first option System from the MAIN main screen.
Press the tab key to navigate to the <OK> button and press enter to go back to
the System Setting screen
-
Choose the option Firmware to update the system as shown below:
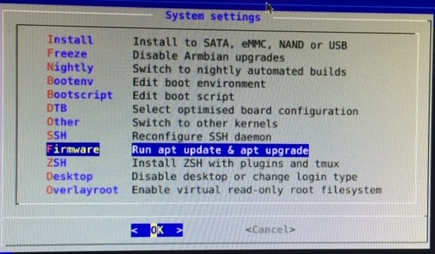
Firmware
Press the tab key to navigate to the <OK> button and press enter. We will
be prompted to confirm as shown below:
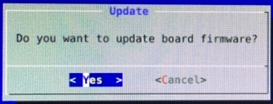
Confirm Update
Press the tab key to navigate to the <Yes> button and press enter. This will
start the update process and after a few minutes we will be prompted to reboot the board once again as shown
below:
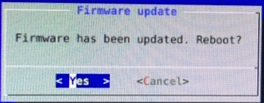
Confirm Reboot
Press the tab key to navigate to the <Yes> button and press enter. This will
reboot the board and take us back to the Armbian desktop.
Once again open a terminal window and execute the following command:
Choose the first option System from the MAIN main screen.
Press the tab key to navigate to the <OK> button and press enter to go back to
the System Setting screen
-
Choose the option Desktop to disable the desktop as shown below:
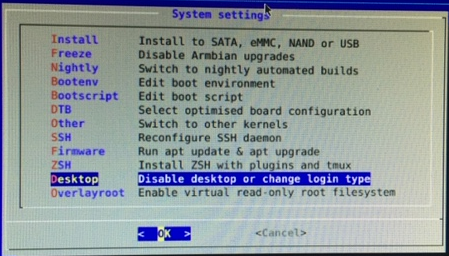
Desktop
Press the tab key to navigate to the <OK> button and press enter. We will
be prompted to confirm if we want to disable the desktop as shown below:
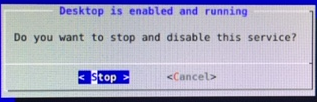
Disable Desktop
Press the tab key to navigate to the <Stop> button and press enter. This will
stop and disable the desktop. This will take us to system login prompt. Login as the user
xu4. At the system prompt execute the following command:
This will take us to the MAIN screen
-
Choose the option Network to configure the network settings as shown below:
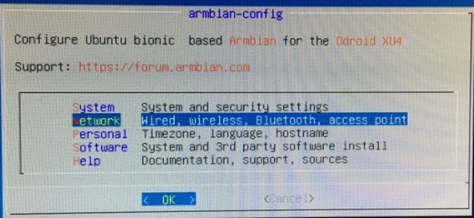
Network
We will refer to this screen as the Network screen.
Press the tab key to navigate to the <OK> button and press enter. This will
open the network options screen as shown below:
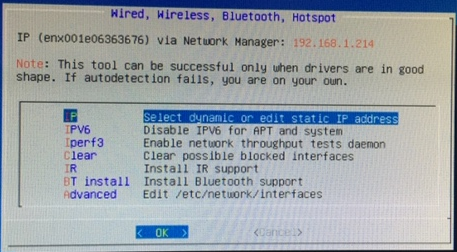
Network Options
Select the first option IP to assign ip-address for this card. Press the tab key
to navigate to the <OK> button and press enter. This will display a screen to
choose the type of ip-address as shown below:
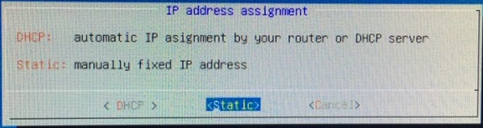
IP Type
We desire to assign static ip-addresses to our cards (so there is predictability the next time we boot). Press
the tab key to navigate to the <Static> button and press enter. This will open
the static ip configuration screen as shown below:
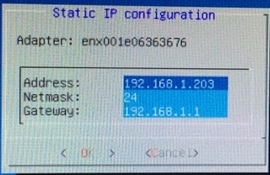
Static IP
Assign a desired static ip-address for this card. In this case, we choose to assign the ip-address
192.168.1.31 for this card. For each of the remaining 4 cards we will assign
the addresses from 192.168.1.32 through 192.168.1.35.
After assigning the desired ip-address, press the tab key to navigate to the <OK>
button and press enter.
Press the tab key to navigate to the <Cancel> button and press enter to return
to the Network screen. Once again, press the tab key to navigate to the
<Cancel> button and press enter to return to the MAIN screen
-
On the MAIN screen navigate to the option Personal as
shown below:
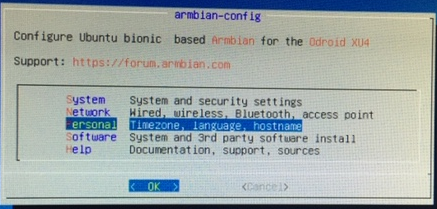
Personal
Press the tab key to navigate to the <OK> and press enter. This will open a screen
as shown below:
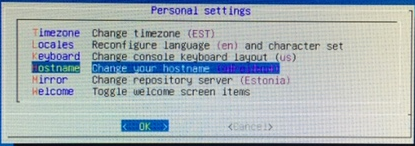
Personal Settings
We will refer to this screen as the Personal Setting screen.
Choose the option Hostname to assign a host-name for this card. Press the tab key
to navigate to the <OK> and press enter. This will open a screen as shown below:

Change Hostname
Assign a desired host-name for this card. In this case, we choose to assign the host-name
my-xu4-1 for this card. For each of the remaining 4 cards we will assign
the host-names from my-xu4-2 through my-xu4-5.
Press the tab key to navigate to the <OK> button and press enter. This will open
a screen as shown below:

Info
Press enter on the <OK> button to return to the MAIN
screen.
On the MAIN screen, press the tab key to navigate to the <Cancel>
button and press enter. This will exit the armbian-config tool
-
At the command prompt, execute the following command:
This will safely shutdown the ODroid XU4 device
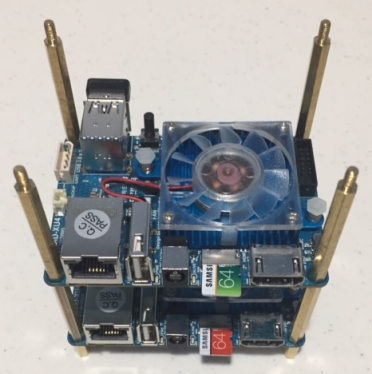
 ODroid XU4
 5V/4A Adapter
 MicroSDXC Card
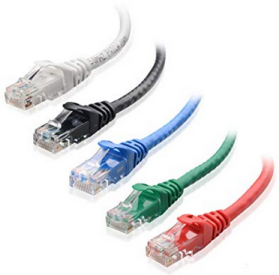 Ethernet Cable
 40mm Spacers
 10mm Spacers
 Ethernet Switch
 USB Card Reader
 Power Strip