A real-world Android application will typically have more than one Activity.
So how do we navigate from one Activity to
another ? Enter Intents !!!
An Intent is instance of the Android
framework class android.content.Intent,
using which one can trigger an asynchronous event to the Android system
for launching another Activity. An Intent
is triggered by invoking the startActivity()
method on an
Activity.
The best way to understand any concept is through an example. So
let us create a new Android application named
DroidMultiActivity to illustrate the concept of navigating from
one Activity to another using an Intent.
This is a quiz application with two Activities
- one is
the main Activity that displays two buttons Start
and Exit to the user. Clicking on the Start
will display the quiz Activity which
displays a question and
expects the user to type the answer in a text box. Also, there are
three buttons
Submit, Next, and Done.
Clicking on the Submit button checks the answer entered by the user and
display a
message if it it correct or the answer if it is wrong. Clicking on the
Next button
displays the next question, and clicking on the Done button closes this
Activity and takes the user to the main Activity.
So without further ado, lets get started. We will not go step-by-step
to show the various
screens since we already did that in Part-2 for the DroidTipCalculator
application.
Modify the contents of the dimens.xml
file to look like the one shown in the
listing 4.1 below:
Next, modify the contents of the strings.xml
file to look like the one shown in the
listing 4.2 below:
As can be inferred from the above listing, we have and array for the
quiz questions and an array for the corresponding answers.
We will have two Activity files - the
main is named activity_one.xml
and the other is named activity_two.xml.
The contents of the activity_one.xml
layout file will look like the one shown in the listing 4.3 below:
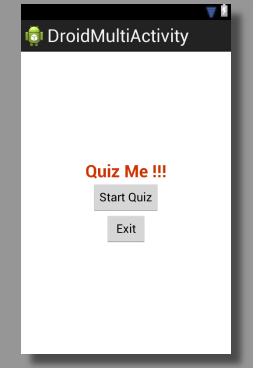
Previewing the activity_one.xml
layout file in the Graphical Mode in Eclipse will look like the one
shown in the figure 4.1 below:
Figure-4.1
The contents of the activity_two.xml
layout file will look like the one shown in the listing 4.4 below:
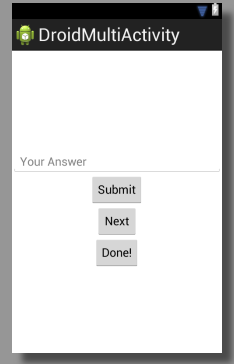
Previewing the activity_two.xml
layout file in the Graphical Mode in Eclipse will look like the one
shown in the figure 4.2 below:
Figure-4.2
Next, modify the contents of the AndroidManifest.xml
file to look like the one shown in the listing 4.5 below:
We need to unravel information relating to Intent
from the
AndroidManifest.xml file. From the Listing
4.5 above, we see
that we have defined the two activities ActivityOne
and
ActivityTwo. Of interest is the element <intent-filter>.
The element <intent-filter>
specifies the Intent(s) for
which the Activity will respond to. The
element <intent-filter>
must include at least one <action>
element and at least one
<category> element.
The <action> element defines the
action to be performed (which in our case is to launch an activity) and
associates a name with it.
The <category> element provides
additional information to the Android
system. For example, the value of android.intent.category.LAUNCHER
indicates the
corresponding Activity is the main or
initial activity while the value of
android.intent.category.DEFAULT indicates the
corresponding Activity
is the default activity.
Finally, we will have two java source files corresponding to the two
Activity files - the main is named ActivityOne.java
and the other is named ActivityTwo.java.
The contents of the java source file ActivityOne.java
will look like the one shown in the listing 4.6 below:
From the code Listing 4.6 above, we see that when one clicks on the Start Quiz
button, we create an instance of Intent
object with the action name
com.polarsparc.android.ACTIVITY_TWO (this has
to match the action name in the AndroidManifest.xml
file) and trigger an event to the Android system by invoking
the startActivity() method. This in effect
will launch the quiz activity
ActivityTwo.
On the other hand, when one clicks the Exit
button, a dialog box is launched
to confirm if one really wants to quit. A dialog box is created using
the Android framework class
AlertDialog.Builder.
The contents of the java source file ActivityTwo.java
will look like the one shown in the listing 4.7 below:
When the quiz activity ActivityTwo is
launched,
the user is presented with a question and expects the user to key in
the answer
in the text box. Once the user clicks the Submit
button,
the answer provided by the user in the text box is verified against the
actual
answer. If the answer matches, a brief message is displayed indicating
the provided
answer is correct. However, if the answer does not match, a brief
message is displayed
indicating the provided answer is wrong and the correct expected
answer. We use the
Andoid framework class Toast to display a
brief message
to the user.
Clicking on the Next button presents the
next question
to the user.
Clicking on the Done button will display
a dialog box
to confirm if the user really wants to quit. If the user click on the Yes
button, the quiz activity is closed and the user is returned to the
main activity.
We are now ready to test our DroidMultiActivity
application on the virtual Android device we created in
Part-1.
We will create a Run Configuration for DroidMultiActivity
as we did in Part-2
for DroidTipCalculator.
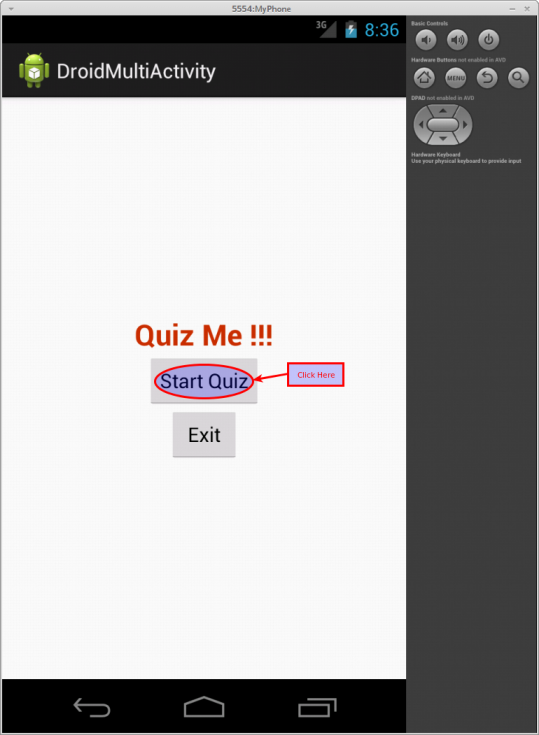
Once the run configuration for DroidMultiActivity
is ready, we will Run
the application and the application will come to life. Click on the
Start Quiz button as shown in the
following figure 4.3 below:
Figure-4.3
This will bring us to the quiz activity screen as shown in the
following figure 4.4 below:
Figure-4.4
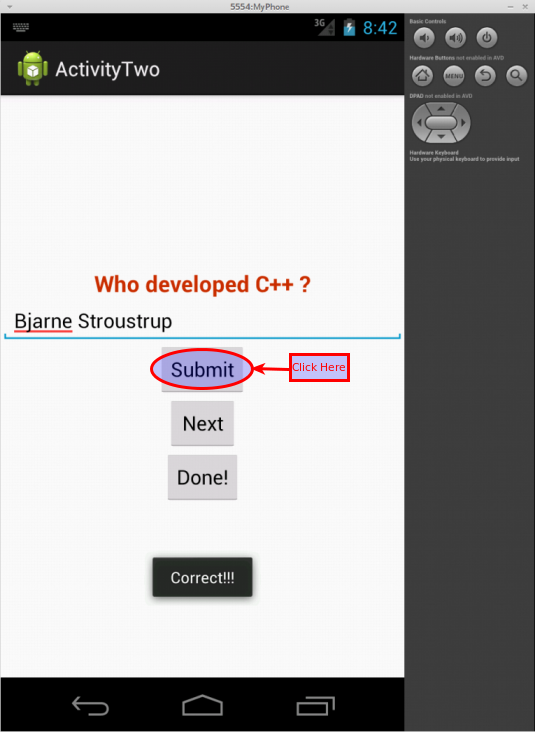
Key in the answer in the text box and click on the Submit
button. Since Bjarne Stroustrup is the
correct answer,
we will see the Correct!!! message as shown
in the following figure 4.5 below:
Figure-4.5
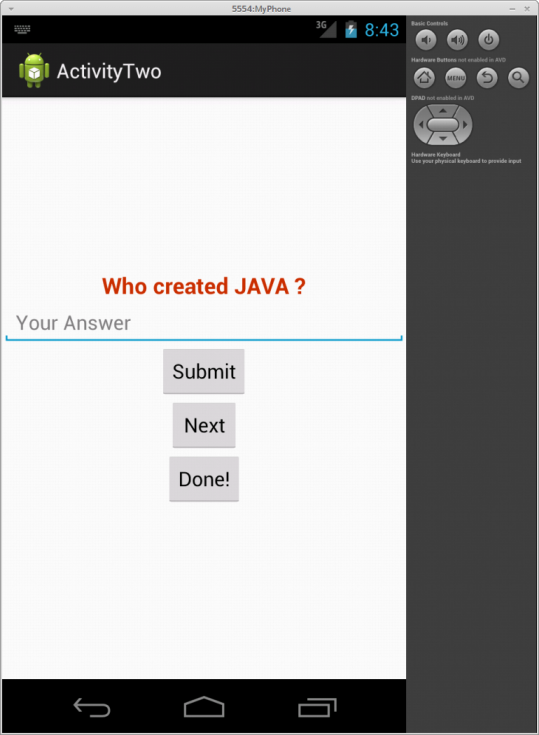
Click on the Next
button and we should see the next question as shown in the
following figure 4.6 below:
Figure-4.6
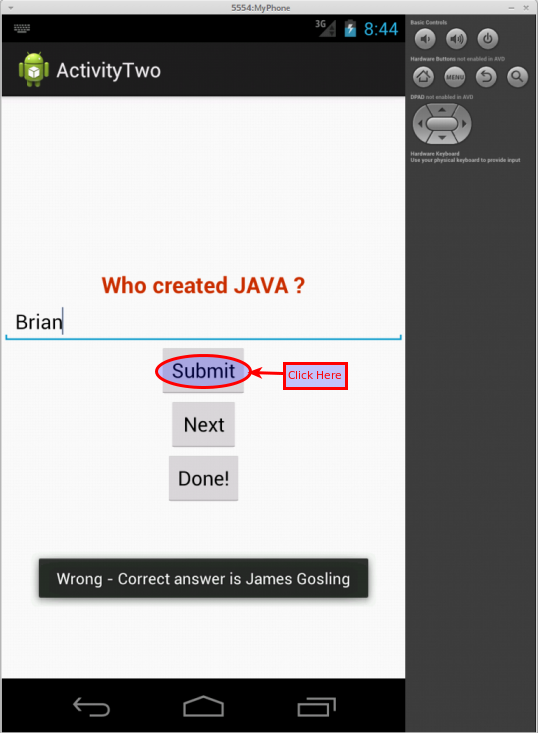
This time key in a wrong answer in the text box and click on the Submit
button. Since Brian is not the
correct answer,
we will see the Wrong - Correct answer is James
Gosling message as shown
in the following figure 4.7 below:
Figure-4.7
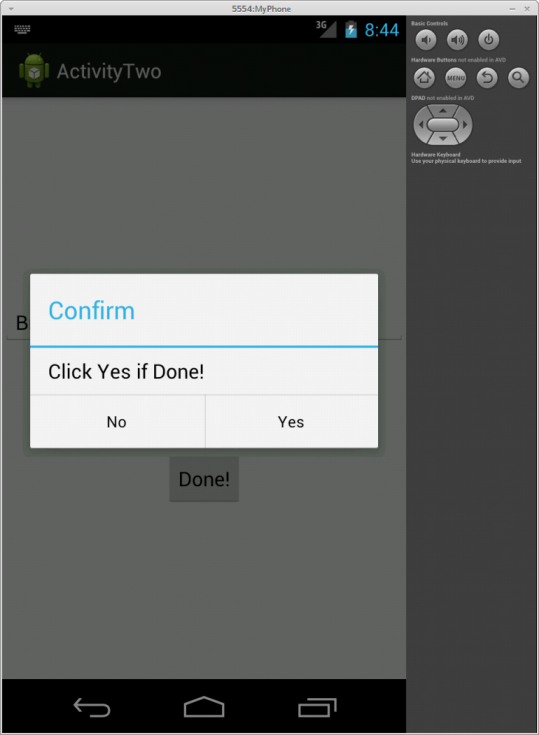
Clicking on the Done
button will display the user confirmation dialog box
as shown in the following figure 4.8 below:
Figure-4.8
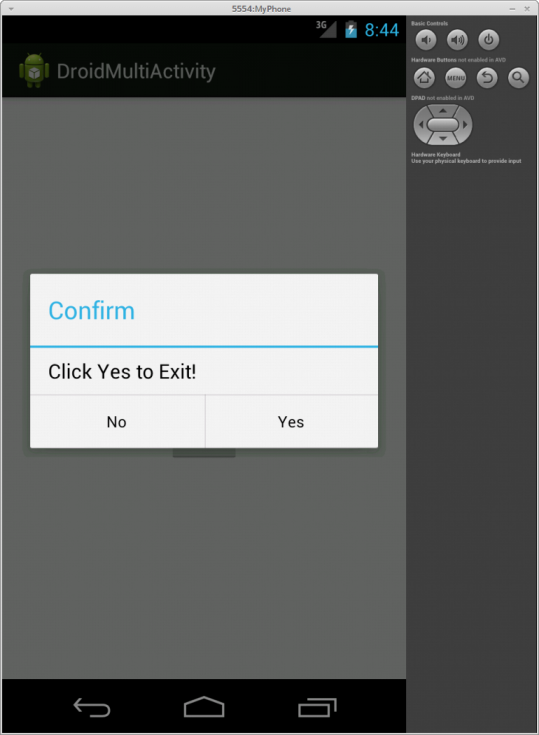
Click on Yes to confirm
and we are taken back to the main activity screen. Clicking on
Exit button will display the user
confirmation dialog box as shown in the following figure 4.9 below:
Figure-4.9
Clicking on Yes to confirm
will exit the application.