Figure.1
| PolarSPARC |
Machine Learning - K Nearest Neighbors using Scikit-Learn
| Bhaskar S | 06/17/2022 |
Overview
K Nearest Neighbors (or KNN for short) is one of the simplest algorithms for classification. It classifies a new incoming target data based on the distance to the old training data.
K Nearest Neighbors
In the following sections, we will develop an intuition for K Nearest Neighbors through visual plots.
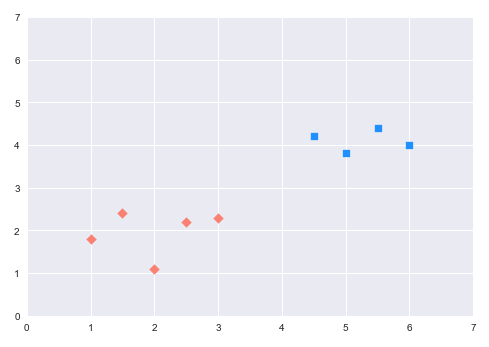
Assume there are two categories (or labels) of entities that have been classified from a data set - a set of red diamonds and a set of blue squares as depicted in the illustration below:
Soon we encounter a new entity (data point) - identified by the green circle as depicted in the illustration below:
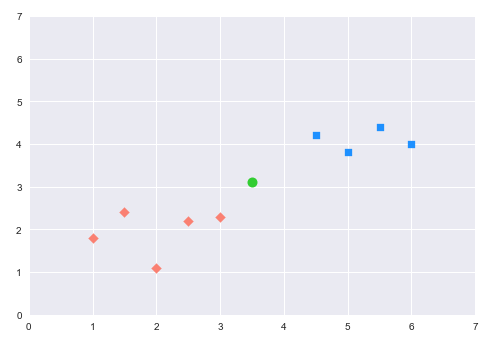
How do we label the new green data point as - is it a red diamond ? Or, a blue square ?
What KNN does is that it computes the distance of the new data point (green circle) to all other training data points. It then selects the K nearest data points, where K is typically an odd integer, such as, 1, 3, 5, etc. Finally it assigns the new data point to the category (or label) to which the majority of the K data points belong to.
Assuming we select K to be 3. Then, the 3 entities that are nearest to the green circle are as depicted in the illustration below:
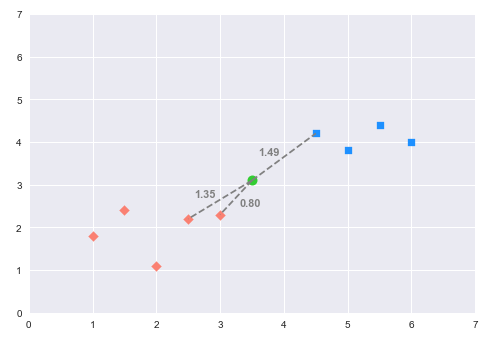
There are 2 red diamonds and a blue square that are nearest to the green circle. Given that the majority is red diamonds, we classify the green circle as the red diamond.
As stated above, the KNN algorithm uses distance as a measure of closeness to existing data points (from the training set) to determine the class label. The following are some of the commonly used distance algorithms:
Manhattan Distance - Given the two vectors $A = (x_1, y_1)$ and $B = (x_2, y_2)$, the Manhattan Distance between the two vectors $A$ and $B$ is computed as the sum of the absolute differences between the two corresponding elements of the vectors.
In other words, the Manhattan Distance $D$ is computed as follows:
$D = \lvert x_1 - x_2 \rvert + \lvert y_1 - y_2 \rvert$
In general terms:
$D = \sum_{i=1}^n \lvert A_i - B_i \rvert$
Euclidean Distance - Given the two vectors $A = (x_1, y_1)$ and $B = (x_2, y_2)$, the Euclidean Distance between the two vectors $A$ and $B$ is computed as the square root of the sum of the squares of the differences between the two corresponding elements of the vectors.
In other words, the Euclidean Distance $D$ is computed as follows:
$D = \sqrt{(x_1 - x_2)^2 + (y_1 - y_2)^2}$
In general terms:
$D = \sqrt{\sum_{i=1}^n (A_i - B_i)^2}$
Minkowski Distance - Given the two vectors $A = (x_1, y_1)$ and $B = (x_2, y_2)$, the Minkowski Distance $D$ between the two vectors $A$ and $B$ is computed as follows:
$D = [(x_1 - x_2)^p + (y_1 - y_2)^p]^{1/p}$
In general terms:
$D = [\sum_{i=1}^n (A_i - B_i)^p]^{1/p}$
Notice that the Minowski Distance is a generalization of the Manhattan Distance ($p = 1$) and Euclidean Distance ($p = 2$)
K Nearest Neighbors (KNN) algorithm uses lazy learning in that it only stores the training samples along with their classes (categories), with little or no processing. When a new test data point is provided to the model for classification, it uses a majority vote of the K-nearest points to determine the corresponding class (or category).
In this following sections, we will demonstrate the use of the KNN model for classification (using scikit-learn) by leveraging the Glass Identification data set.
The first step is to import all the necessary Python modules such as, pandas, matplotlib, seaborn, and scikit-learn as shown below:
import pandas as pd
import matplotlib.pyplot as plt
from sklearn.preprocessing import StandardScaler
from sklearn.model_selection import train_test_split, GridSearchCV
from sklearn.neighbors import KNeighborsClassifier
from sklearn.metrics import accuracy_score
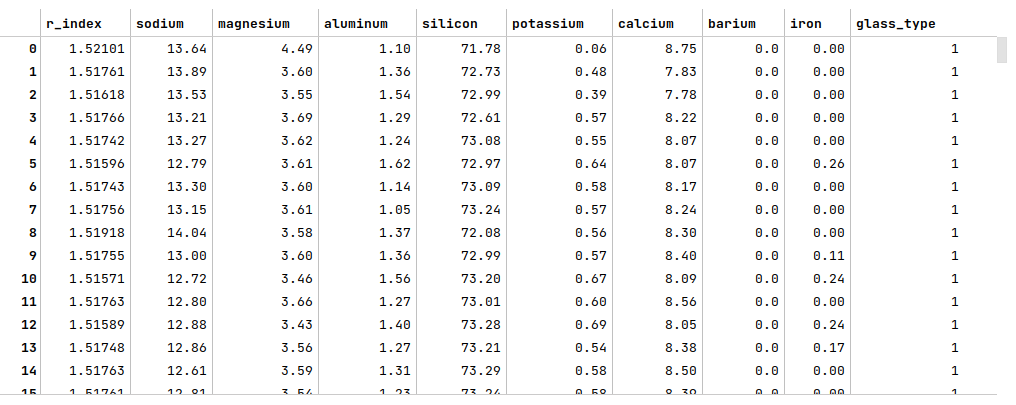
The next step is to load the glass identification data set into a pandas dataframe, set the column names, and then display the dataframe as shown below:
url = 'https://archive.ics.uci.edu/ml/machine-learning-databases/glass/glass.data'
glass_df = pd.read_csv(url, header=None)
glass_df = glass_df.drop(glass_df.columns[0], axis=1)
glass_df.columns = ['r_index', 'sodium', 'magnesium', 'aluminum', 'silicon', 'potassium', 'calcium', 'barium', 'iron', 'glass_type']
glass_df
The following illustration displays few rows from the glass identification dataframe:
The next step is to display information about the glass identification dataframe, such as index and column types, missing (null) values, memory usage, etc., as shown below:
glass_df.info()
The following illustration displays information about the glass identification dataframe:
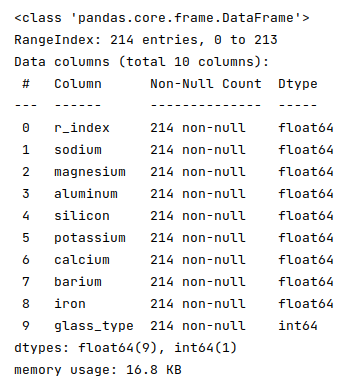
Fortunately, the data seems clean with no missing values.
The next step is to split the glass identification dataframe into two parts - a training data set and a test data set. The training data set is used to train the classification model and the test data set is used to evaluate the classification model. In this use case, we split 75% of the samples into the training dataset and remaining 25% into the test dataset as shown below:
X_train, X_test, y_train, y_test = train_test_split(glass_df, glass_df['glass_type'], test_size=0.25, random_state=101)
X_train = X_train.drop('glass_type', axis=1)
X_test = X_test.drop('glass_type', axis=1)
The next step is to create an instance of the standardization scaler to scale the desired feature (or predictor) variables in both the training and test dataset as shown below:
scaler = StandardScaler()
s_X_train = pd.DataFrame(scaler.fit_transform(X_train), columns=X_train.columns, index=X_train.index)
s_X_test = pd.DataFrame(scaler.fit_transform(X_test), columns=X_test.columns, index=X_test.index)
It is very IMPORTANT to scale the feature (or predictor) variables since KNN uses distance to determine the target class (category).
The next step is to initialize the KNN model class from scikit-learn with 3 neighbors and train the model using the training data set as shown below:
model = KNeighborsClassifier(n_neighbors=3)
model.fit(s_X_train, y_train)
The next step is to use the trained model to predict the glass_type using the test dataset as shown below:
y_predict = model.predict(s_X_test)
The next step is to display the accuracy score for the model performance as shown below:
accuracy_score(y_test, y_predict)
The following illustration displays the accuracy score for the model performance:
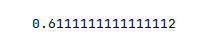
From the above, one can infer that the model seems to predict okay. Can we improve the accuracy score ???
One of the hyperparameters used by the K Nearest Neighbors is n_neighbors, which controls the number of neighbors.
The next step is to perform an extensive grid search on a list of hyperparameter values to determine the optimal value of the hyperparameter n_neighbors and display the optimal value as shown below:
parameters = {
  'n_neighbors': range(1, 26, 2)
}
cv_model = GridSearchCV(estimator=model, param_grid=parameters, cv=5, verbose=1, scoring='accuracy')
cv_model.fit(s_X_train, y_train)
cv_model.best_params_
The following illustration displays the optimal value for the hyperparameter n_neighbors:

The next step is to re-initialize the K Nearest Neighbors model with the hyperparameter n_neighbors set to the value of 1 and re-train the model using the training data set as shown below:
model = KNeighborsClassifier(n_neighbors=1)
model.fit(s_X_train, y_train)
The next step is to use the trained model to predict the glass_type using the test dataset as shown below:
y_predict = model.predict(s_X_test)
The final step is to display the accuracy score for the model performance as shown below:
accuracy_score(y_test, y_predict)
The following illustration displays the accuracy score for the model performance:
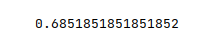
From the above, one can infer that the model seems to predict much better now.
Hands-on Demo
The following is the link to the Jupyter Notebook that provides an hands-on demo for this article: