Figure-1
Introduction to WebSockets :: Part - 1
| Bhaskar S | 02/08/2014 |
Overview
WebSockets were introduced in HTML5 to provide a real-time, bi-directional, full-duplex (using a single TCP socket connection) communication between a client (HTML5 compliant browser) and a server (HTML5 compliant web server).
Using WebSockets, one can build scalable and interactive real-time web applications with ease without resorting to any type of polling mechanism.
WebSockets consists of two aspects - the WebSocket Application Programming Interface (API) that has been defined and standardized by the World Wide Web Consortium (W3C) in the specification WebSockets and the WebSocket Network Protocol that has been defined and standardized by the Internet Engineering Task Force (IETF) in the specification RFC 6455.
WebSocket API uses an event-driven programming model with well-defined callbacks both on the client as well as the server.
WebSocket Protocol is an application level protocol that rides on top of the streams-based TCP network protocol.
Installation and Setup
The best way to try and learn anything is to roll-up our sleeves and get our hands dirty.
We will demostrate the capabilities of WebSocket in a Ubuntu based Linux environment.
For the server-side, we will need an HTML5 compliant web-server that supports WebSockets.
For the client-side, most of the mordern web-browsers such as Mozilla Firefox or Google Chrome would suffice. We will use Firefox for our demonstration.
Download the Apache Tomcat 8.x Core from the following site:
Apache Tomcat 8.x (http://tomcat.apache.org/)
Unzip the just downloaded Tomcat 8.x Core in a directory of your choice. We will refer to the root of the Tomcat 8.x Core directory using the environment variable CATALINA_HOME.
To start the Tomcat 8.x server, issue the following command:
$CATALINA_HOME/bin/startup.sh
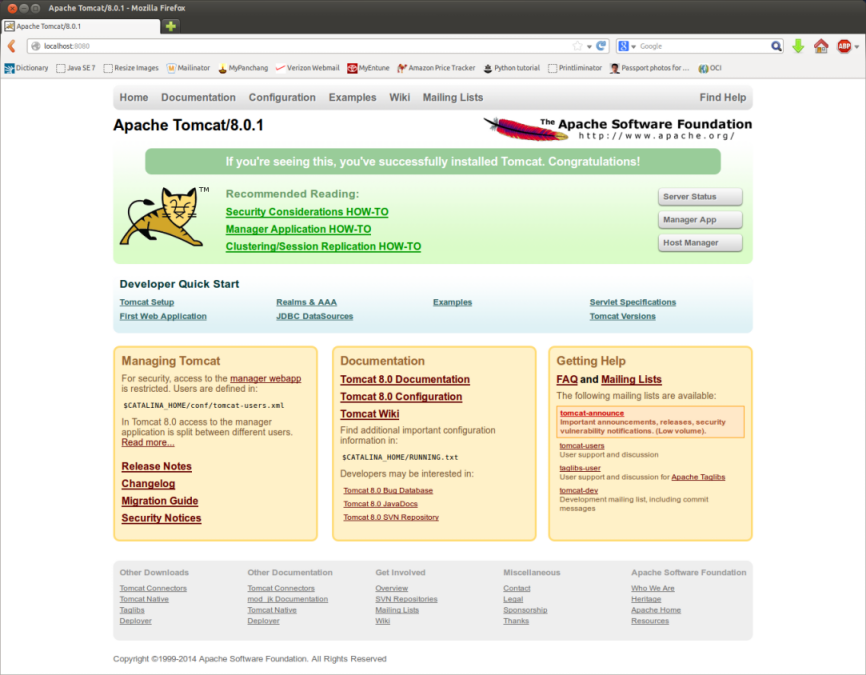
Now launch Firefox and enter the following URL:
We should see something like the following Figure-1 in the browser:
To shut the Tomcat 8.x server, issue the following command:
$CATALINA_HOME/bin/shutdown.sh
Hands-on with WebSockets
We will demonstrate the use of WebSockets with a simple monitoring example that will display the CPU usage in the User and Kernal space.
Note that this example will work only on the Linux platforms.
The following is the server-side Java code that will push the CPU metrics at a regular interval of 5 seconds:
Some aspects of the source code in Listing.1 above needs a little explaining so we can get our head around the server-side of WebSockets.
The annotation @ServerEndpoint is defined in the java class javax.websocket.server.ServerEndpoint.
The @ServerEndpoint annotation can be applied only to a class and defines the WebSocket server endpoint.
It takes an URI as the value and is where the WebSocket server will be waiting for WebSocket client connections.
The annotation @OnOpen is defined in the java class javax.websocket.OnOpen.
The @OnOpen annotation can be applied only to a method and is called when a WebSocket client connection is opened.
The annotation @OnClose is defined in the java class javax.websocket.OnClose.
The @OnClose annotation can be applied only to a method and is called when a WebSocket client connection is closed.
The annotation @OnMessage is defined in the java class javax.websocket.OnMessage.
The @OnMessage annotation can be applied only to a method and is called when the WebSocket server receives a message from a WebSocket client.
The annotation @OnError is defined in the java class javax.websocket.OnError.
The @OnError annotation can be applied only to a method and is called whenever a WebSocket connection error occurs.
The java class javax.websocket.Session defines a WebSocket session which represents a conversation between the two WebSocket endpoints (a client and the server).
A new Session is created for each WebSocket client connection.
The method isOpen() on a Session returns a true only when the WebSocket connection is open.
The method getBasicRemote() on a Session returns an instance of the class javax.websocket.RemoteEndpoint.Basic.
The method sendText() on a RemoteEndpoint.Basic allows one to send messages in a synchronous blocking manner.
The following is the client-side HTML/JavaScript code that initializes and uses a WebSocket connection:
Some aspects of the HTML code in Listing.2 above needs a little explaining so we can understand the client-side of WebSockets.
To establish a WebSocket connection with the WebSocket server endpoint, instantiate a client-side WebSocket object.
In the Listing.2 above, the call new WebSocket('ws://localhost:8080/polarsparc/SimpleMonitor') is what instantiates a client-side WebSocket object and establishes a connection with the server endpoint.
The constructor for the WebSocket object, takes a URL of the server endpoint as the input argument. Notice the use of ws as the scheme when specifying the URL.
As indicated earlier, the WebSocket API uses event-driven programming model. The client-side code needs to register different callback functions on the WebSocket object to handle connection status changes and incoming message(s).
The onopen event is fired when a WebSocket connection is established.
The onclose event is fired when a WebSocket connection is closed.
The onmessage event is fired when the client receives a message from the WebSocket server.
The onerror event is fired whenever the client WebSocket connection encounters any errors. Typically, the WebSocket connection is closed on errors.
The method send() on a WebSocket object is used to send a message to the WebSocket server.
The method close() on a WebSocket object is used to close the connection to the WebSocket server.
Now that we have the code for both the WebSocket server and client, we need to perform some setup as follows:
Create the directory polarsparc under the directory $CATALINA_HOME/webapps
Create the directory WEB-INF under the directory $CATALINA_HOME/webapps/polarsparc
Create the directory classes under the directory $CATALINA_HOME/webapps/polarsparc/WEB-INF
Create the directory structure com/polarsparc/websockets under the directory $CATALINA_HOME/webapps/polarsparc/WEB-INF/classes
Copy the java classes of the server SimpleMonitor under the directory $CATALINA_HOME/webapps/polarsparc/WEB-INF/classes/com/polarsparc/websockets
Copy the html file of the client SimpleMonitor.html under the directory $CATALINA_HOME/webapps/polarsparc
Start the Tomcat 8.x server
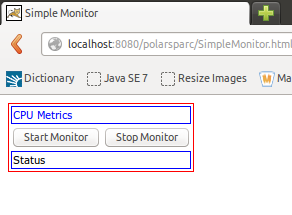
Now launch Firefox and enter the following URL:
We should see something like the following Figure-2 in the browser:
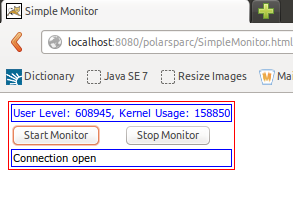
Clicking on the Start Monitor button, we should see something like the following Figure-3 in the browser:
Clicking on the Stop Monitor button closes the WebSocket connection and stops the message stream.