Figure-7.1
Taste of Android :: Part-7
| Bhaskar S | 06/02/2013 |
Android Application Development - VI
When an Android application is launched, the Android system starts a new Linux process with a single thread of execution. The main thread of execution if often referred to as the main thread or the UI thread and is responsible for rendering all the widgets in an Activity as well as handling events due to user interactions.
What happens when we have to update the user interface by fetching data from the database or the network which can take some time ? If we used the UI thread, it will result in a sluggish performance which will lead to poor user experience.
Hmmm. We should be able to create a new background thread to help out here - can't we ???
Well, it turns out that we have to honor the following two golden rules of an user interface (Activity) in Android:
Never block the UI thread for a long time. Violating this will result in Android displaying the Application Not Responding error, and the application may be killed
Never update the user interface from outside of the UI thread. Violating this will result in CalledFromWrongThreadException
Enter the Android framework class android.os.Handler. A Handler allows one to send and receive messages. The messages are instances of the Android framework class android.os.Message. A Handler is associated with the main UI thread and is responsible for updating the user interface in response to a Message from another thread. When a new instance of Handler is created, it is associated with the thread creating the instance. Typically, an instance of Handler is created in the Activity so that its associated with the main UI thread. This way we have honored the golden rules of the user interface.
We will now demonstrate this concept of using Threads with Messages and Handlers by creating a new Android application named DroidStockTicker.
The application will contain an Activity that will display a list of stock symbols along with thier current prices and value changes. We will use a ListView to display the stock ticker for each symbol in a separate row. Each row will be divided into four columns to display symbol, current price, price change, and an image indicating the change direction (green up arrow, red down arrow, etc). In this application we will simulate the stock prices locally rather than making any network calls to fetch the real prices.
Without further ado, lets get started. We will not go step-by-step to show the various screens since we already did that in Part-2 for the DroidTipCalculator application.
The contents of the dimens.xml file to look like the one shown in the listing 7.1 below:
The contents of the strings.xml file to look like the one shown in the listing 7.2 below:
From the listing 7.2, we can see that we have defined two arrays - one for the stock symbols and the other for the opening price of the stock.
We will have two layout definitions files - one for the main stock ticker Activity and the other is for each of the row in the ListView. The layout file for the main stock ticker Activity is named activity_stock_ticker.xml while the layout file for the list row is named list_item_row.xml.
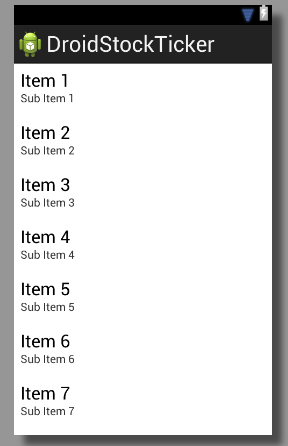
The contents of the activity_stock_ticker.xml layout file will look like the one shown in the listing 7.3 below:
Previewing the activity_stock_ticker.xml layout file in the Graphical Mode in Eclipse will look like the one shown in the figure 7.1 below:
The contents of the list_item_row.xml layout file will look like the one shown in the listing 7.4 below:
From the listing 7.4 above, the things of interest would be the following:
TableLayout :: a layout that arranges the widgets in rows and columns
TableRow :: a layout that arranges the widgets horizontally and is always defined inside a TableLayout
ImageView :: a widget that is used to dispaly any image
android:layout_weight :: assigns an importance to a widget in relation to the other widget(s) in a layout and controls how the widget expands to use the extra space in the layout. The default value is zero which means dont expand
We want each row in the list to be divided into four equal sized columns. To achieve this, we need to set the attribute android:layout_width to 0dp and the attribute android:layout_weight to 1.
We will use Java Enum to indicate the direction of the change (up, flat, or down). This is encapsulated in the Java class TickSignal as shown in the listing 7.5 below:
We will need an in-memory representation of the stock ticker for each stock symbol that will encapsulate the stock ticker attributes such as the symbol, the open price, the change, and the change direction. This is encapsulated in the Java class StockTicker as shown in the listing 7.6 below:
As indicated earlier, we are using a ListView to display the stock ticker for the list of stock symbols. The source of data for our ListView will be a list of StockTicker objects in memory. So, how do we connect the list of objects in memory to the ListView ???
Enter the Android framework class Adapter. An Adapter is the bridge between the ListView widget and the underlying data set. It is responsible for taking each instance of StockTicker objects in memory and displaying it as a row in the ListView.
The Adapter class is an interface. The Android framework provides some concrete implementations like the ArrayAdapter class. The ArrayAdapter class is useful for displaying a list (or array) of simple text string items in a ListView. In our case, we want to display four equally spaced columns with text and image. For this we need a customized version of ArrayAdapter. This is encapsulated in the Java class TickerArrayAdapter as shown in the listing 7.7 below:
From the listing 7.7 above, the things of interest would be the following:
getView() :: a method that is invoked by the ListView on the Adapter to display a data item as a row.
The first argument position is the index (starting at 0) of the data item from the list (or array) of items in the underlying data source of the Adapter. Realize due to the device screen size, we may be able to display only a certain finite number of rows where there may be many more data items in the underlying data source of the Adapter.
The second argument convertView is the displayed (visible) row from the ListView. Assume that the device screen can display only 10 rows. Also, assume we have 15 data items in the list of the Adapter. When the application starts, data items from index 0 through index 9 (10 items) will be displayed in the ListView. For each of the data items (index 0 through 9), the getView() method is invoked with the convertView parameter as null. This is because we have not yet created a row view to display in the ListView. This is the reason we have an if condition check for null on convertView and accordingly create a new row view when true. When we scroll down the ListView by one row, the data item at index 0 should be taken out and the data item at index 10 should be displayed. In this case the Android system will pass the reference to the row view originally used for data item at index 0. We re-use this instance (rather than create a new row view which can be memory intensive) to display data item at index 10.
The last argument parent is the reference to the row view holder, which is the ListView in our case.
LayoutInflater :: allows one to create a View object for a given reference to the XML layout definition
Finally, we have the java source file corresponding to the main stock ticker Activity called StockTickerActivity.java.
The contents of the java source file StockTickerActivity.java will look like the one shown in the listing 7.8 below:
From the code Listing 7.8 above, the following are some of the interesting details:
In the OnCreate() method, we create an ArrayList of StockTicker objects corresponding to the symbols and open prices from strings.xml
Create an instance of TickerArrayAdapter object with the ArrayList of StockTicker objects as the data set for the ListView
Create an instance of Handler object and override the handleMessage() method. This method is called each time the Handler receives a Message. We use this method to invoke the notifyDataSetChanged() method on the Adapter to notify changes to the underlying data items so that the ListView will be refreshed
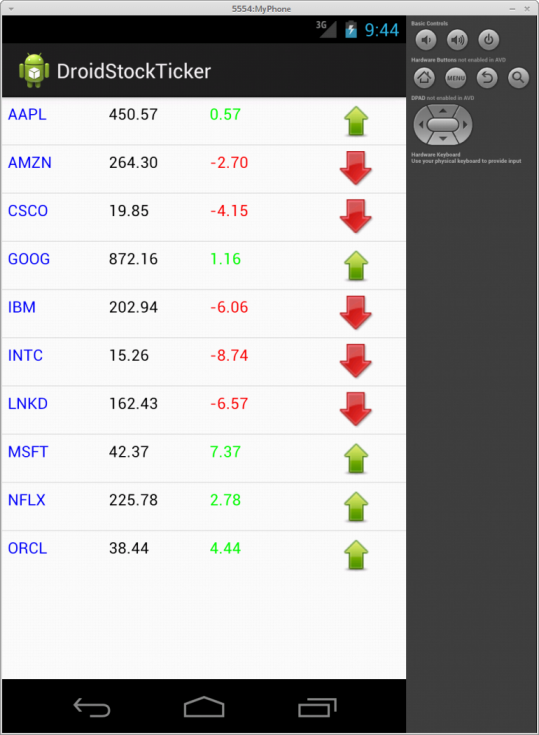
Finally, create a background Thread that will wake-up every 10 seconds, update the stock price for each symbol in the ArrayList of StockTicker objects and send an empty Message to the Handler
We are now ready to test our DroidStockTicker application on the virtual Android device we created in Part-1. We will create a Run Configuration for DroidStockTicker as we did in Part-2 for DroidTipCalculator.
Once the run configuration for DroidStockTicker is ready, we will Run the application and the application will come to life as shown in the following figure 7.2 below:
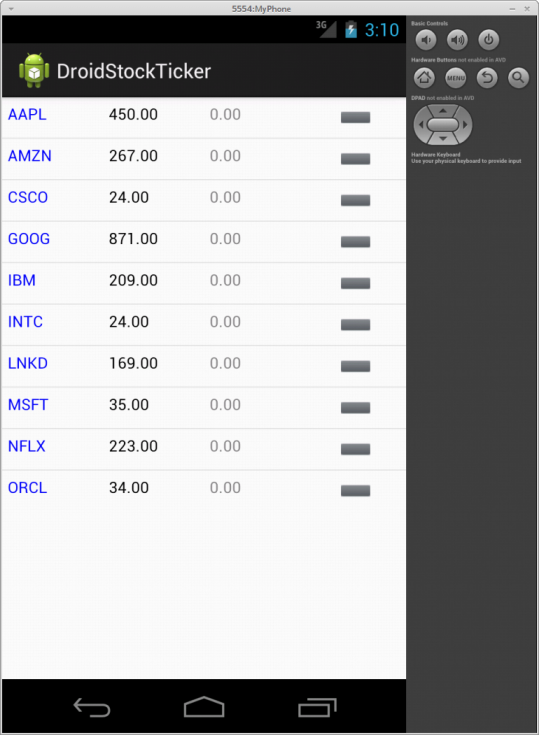
Wait about 10 seconds and the device screen will be refreshed as shown in the following figure 7.3 below:
References