Figure.1
| PolarSPARC |
Textual Sentiment Analysis using NLTK and Scikit-Learn
| Bhaskar S | 02/11/2023 |
Overview
In the articles, Basics of Natural Language Processing using NLTK and Feature Extraction for Natural Language Processing, we covered the necessary ingredients of Natural Language Processing (or NLP for short).
Sentiment Analysis in NLP is the process of determining if a textual data (especially the feedback from customers) is POSITIVE or NEGATIVE.
In this following sections, we will demonstrate how one can perform sentiment analysis (using nltk and scikit-learn) by leveraging the Restaurant Reviews data set from Kaggle.
Installation and Setup
Please refer to the article Feature Extraction for Natural Language Processing for the environment installation and setup.
Open a Terminal window in which we will excute the various commands.
To launch the Jupyter Notebook, execute the following command in the Terminal:
$ jupyter notebook
Hands-On Sentiment Analysis
The first step is to import all the necessary Python modules such as, pandas, nltk, and scikit-learn by running the following statements in the Jupyter cell:
import nltk
import pandas as pd
from collections import defaultdict
from nltk.tokenize import WordPunctTokenizer
from sklearn.feature_extraction.text import TfidfVectorizer
from sklearn.model_selection import train_test_split
from sklearn.linear_model import LogisticRegression
from sklearn.naive_bayes import MultinomialNB
from sklearn.ensemble import RandomForestClassifier
from sklearn.metrics import accuracy_score
To set the correct path to the nltk data packages, run the following statement in the Jupyter cell:
nltk.data.path.append("/home/alice/nltk_data")
Download the Kaggle Restaurant Reviews data set to the directory /home/alice/txt_data.
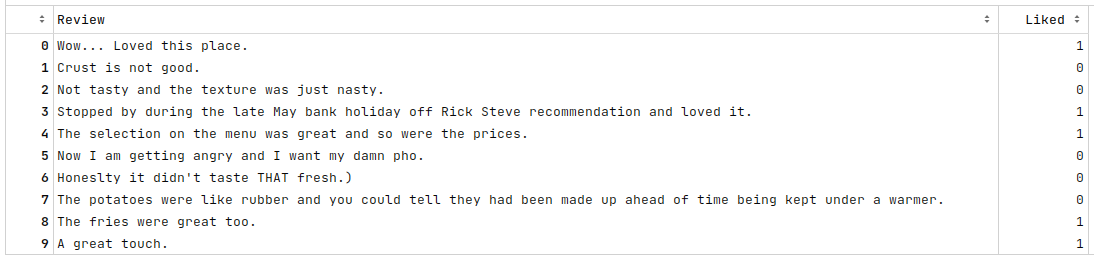
To load the tab-separated restaurant reviews data set into pandas and display the first 10 rows, run the following statements in the Jupyter cell:
reviews_df = pd.read_csv('./txt_data/Restaurant_Reviews.tsv', sep='\t')
reviews_df.head(10)
The following would be a typical output:
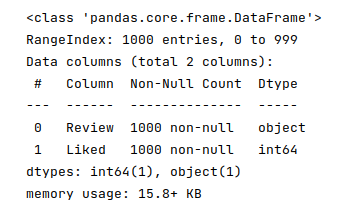
To display basic information about the reviews dataframe, run the following statement in the Jupyter cell:
reviews_df.info()
The following would be a typical output:
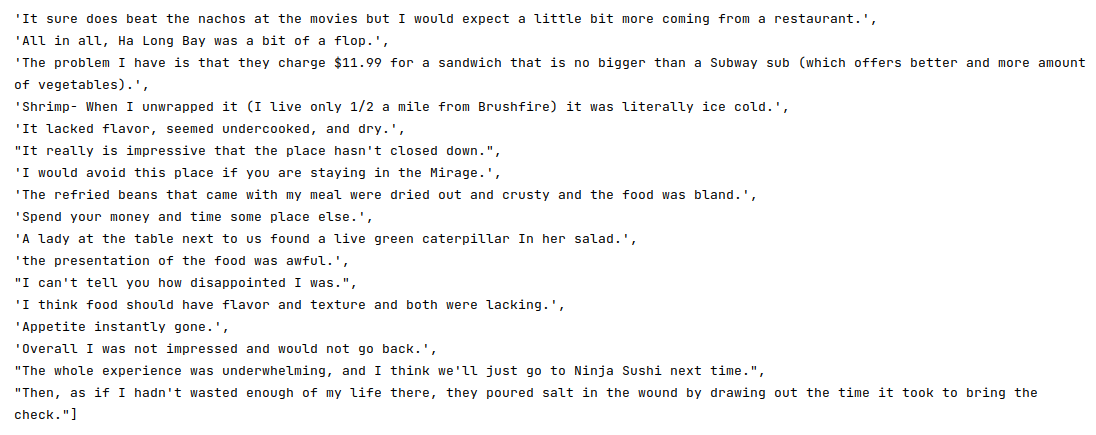
To extract all the text reviews as a list of sentences (corpus) and display a subset of the reviews from the end, run the following statements in the Jupyter cell:
reviews_txt = reviews_df.Review.values.tolist()
reviews_txt
The following would be a typical output:
To create an instance of the word tokenizer and lemmatizer, run the following statements in the Jupyter cell:
word_tokenizer = WordPunctTokenizer()
word_lemmatizer = nltk.WordNetLemmatizer()
To cleanse the sentences from the corpus by removing the punctuations, two-letter words, converting words to their roots, collecting all the unique words from the reviews corpus, and display a subset of the reviews from the end run the following statements in the Jupyter cell:
vocabulary_dict = defaultdict(int)
cleansed_review_txt = []
for review in reviews_txt:
tokens = word_tokenizer.tokenize(review)
alpha_words = [word.lower() for word in tokens if word.isalpha() and len(word) > 2]
final_words = [word_lemmatizer.lemmatize(word) for word in alpha_words]
for word in final_words:
vocabulary_dict[word] += 1
cleansed_review = ' '.join(final_words)
cleansed_review_txt.append(cleansed_review)
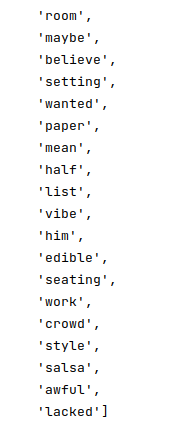
cleansed_review_txt
The following would be a typical output:

We are not REMOVING the stop words as we will lose important context from the reviews. As an example, if we remove the stop word 'not', then the review 'Food was not good' would become 'Food was good'
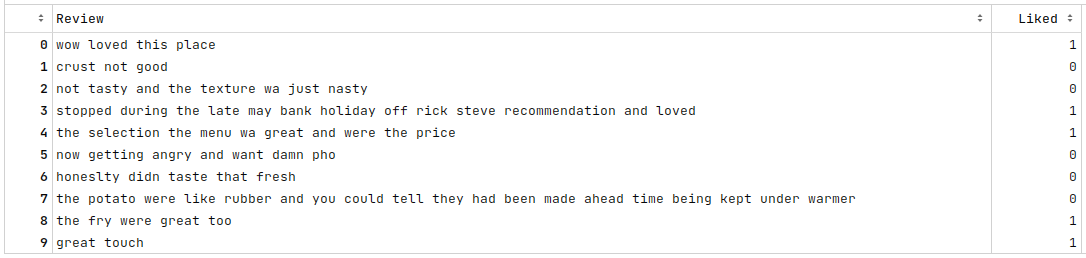
To update the original reviews in the reviews dataframe with the cleansed restaurant reviews and display the first 10 rows, run the following statements in the Jupyter cell:
reviews_df['Review'] = cleansed_review_txt
reviews_df.head(10)
The following would be a typical output:
To display the number of unique words in our reviews corpus, run the following statement in the Jupyter cell:
len(vocabulary_dict)
The following would be a typical output:

There are quite a lot of words in our reviews corpus. We will filter span class="underbold">OUT words which occur less than 3 times in our corpus in order to manage the number of unique words and hence reduce the feature dimension.
To filter out words and display the final subset of the vocabulary entries from our corpus, run the following statements in the Jupyter cell:
vocabulary = []
sorted_vocabulary = sorted(vocabulary_dict.items(), key=lambda kv: kv[1], reverse=True)
for word, count in sorted_vocabulary:
    if count > 2:
        vocabulary.append(word)
vocabulary
The following would be a typical output:
To display the number of unique words in our reviews corpus after filtering, run the following statement in the Jupyter cell:
len(vocabulary)
The following would be a typical output:

To create an instance of the TF-IDF vectorizer, run the following statement in the Jupyter cell:
word_vectorizer = TfidfVectorizer(vocabulary=vocabulary)
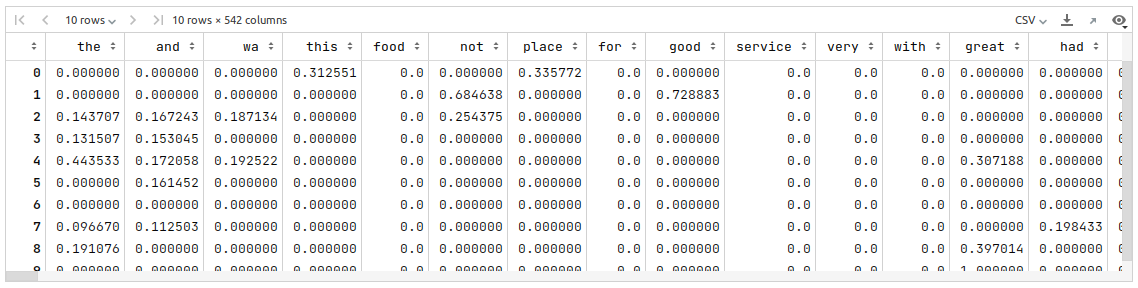
To create a new TF-IDF scores vector for our reviews corpus as a pandas dataframe, add the Liked column as the column _pos_neg, and display the first 10 rows of the dataframe, run the following statements in the Jupyter cell:
matrix = word_vectorizer.fit_transform(reviews_df['Review']).toarray()
reviews_vector_df = pd.DataFrame(data=matrix, columns=vocabulary)
reviews_vector_df['_pos_neg'] = reviews_df['Liked']
reviews_vector_df.head(10)
The following would be a typical output:
The next step is to split the vectorized reviews dataframe into two parts - a training data set and a test data set. The training data set is used to train the different machine learning models and the test data set is used to evaluate the models. In this use case, we split 75% of the samples into the training dataset and remaining 25% into the test dataset as shown below:
To split 75% of the vectorized reviews dataframe into the training set and remaining 25% into the test set, run the following statements in the Jupyter cell:
X_train, X_test, y_train, y_test = train_test_split(reviews_vector_df, reviews_vector_df['_pos_neg'], test_size=0.25, random_state=101)
X_train = X_train.drop('_pos_neg', axis=1)
X_test = X_test.drop('_pos_neg', axis=1)
In the articles, Machine Learning - Logistic Regression using Scikit-Learn - Part 2, Machine Learning - Naive Bayes using Scikit-Learn, and Machine Learning - Random Forest using Scikit-Learn, we covered the necessary details for the three machine learning models - Logistic Regression, Naive Bayes, and Random Forest.
To initialize the three machine learning models, run the following statements in the Jupyter cell:
model_names = ['Logistic Regression', 'Multinomial Naive Bayes', 'Random Forest']
model_instances = [LogisticRegression(), MultinomialNB(), RandomForestClassifier()]
ml_models = zip(model_names, model_instances)
To train each of the machine learning models using the training data, test the trained model using the test data, compute the accuracy score of the model, and display the results, run the following statements in the Jupyter cell:
for name, model in ml_models:
  model.fit(X_train, y_train)
  y_predict = model.predict(X_test)
  score = accuracy_score(y_test, y_predict)
  print(f'Model: {name}, Accuracy: {score}')
The following would be a typical output:
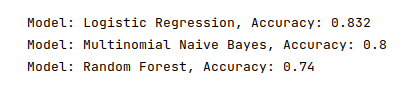
As is evident from the Figure.10 above, the Logistic Regression model performed better for our restaurant reviews use-case.
Jupyter Notebook
The following is the link to the Jupyter Notebook that provides an hands-on demo for this article:
References
Basics of Natural Language Processing using NLTK
Feature Extraction for Natural Language Processing
Machine Learning - Logistic Regression using Scikit-Learn - Part 2